Quick Start
How to Create and Implement an Agent in Minutes.
Step 1: Navigate to the Dashboard
After signing in, head over to the dashboard. From the home page, click the black "Dashboard" button at the top right of the page, or go directly to https://agentonline.ai/dashboard.
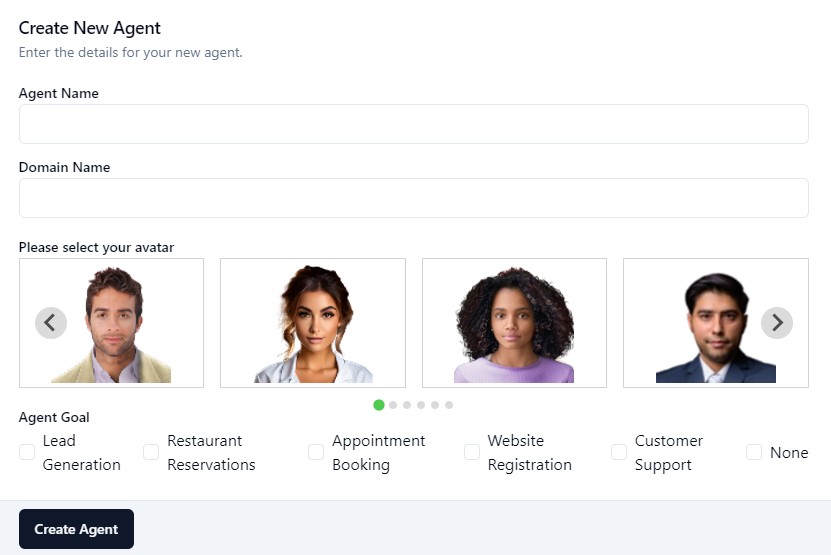
Step 2: Name Your Agent
In the "Agent Name" field, enter a name for your agent. This is how your agent will introduce themselves to visitors. You can choose any name you like—whether it's a human name like "John" or "Sarah," or something more generic like "Agent One." Just remember that if you create multiple agents for the same domain, each one must have a unique name.
Step 3: Provide Your Website’s Domain
Enter your website’s domain in the "Domain Name" field. This serves two purposes:
- Domain Validation: Ensures your agent is installed on the correct site, preventing it from being used on an unintended domain.
- Agent Training: Our application crawls your website to train your agent with publicly available information only. If you prefer not to have your site crawled, you can manually train your agent later. For now, a domain is still required.
Step 4: Choose an Avatar
Use the arrows to browse through the available avatars and select the one you prefer. A blue border will appear around the selected avatar.
Step 5: Choose a Voice
This feature is still under development, so default voices will be used for now. You can skip this step until voice selection is available.Step 6: Choose an Agent Goal
For a quick setup, select "None" for now. You can set or change the agent’s goal later in the Agent Editor. More details are available in the "Agent Goal" section of the User Guide.
Step 7: Create Your Agent
Click the "Create Agent" button. Once created, your agent will appear in the table below the form with a status of "new, please train."
Step 8: Train Your Agent
Note: This Quick Start guide uses automated training which will crawl your website, see Agent Training for instructions on how to train your agent manually.Click the "Train Agent" icon.
Training may take up to 90 seconds—please don’t navigate away from the page during this time. You’ll see a spinning gear icon while the training is in progress. Once complete, the status will change to "trained."
To verify the training, open the Agent Editor by clicking the "Agent Editor" icon.
Then, select the "Training Document Editor" tab to view the formatted training document.
Congratulations! Your Agent is Ready!
- To preview and interact with your agent, click the "Preview" icon.
- To get the embed code, click the "Embed Code" icon.
Final Step: Add the Embed Code to Your Website
Place the snippet of code somewhere within your website’s HTML. We recommend placing it just before the closing </body> tag to ensure the agent loads last, allowing everything else on the page to load normally.
Note: Your agent must be in "online" status to render on your website. If your agent is still in "preview" status, consult the common issues list to change it to "online."